How To Setup Shopify Google Ads Conversion Tracking
If you’re an online store owner or agency running a Shopify store and using Google Ads, understanding your conversions is vital for making data-driven decisions. The great news? Shopify Google Ads Conversion Tracking can help you track these vital metrics, and setting it up with Shopify is easier than you might think.
In this detailed guide, we’ll walk you through each step of the process to ensure you’re tracking your conversions the right way and pulling all the right information to your Google Ad campaigns.
Step 1: Understand Google Ads Conversion Tracking
Before diving into the setup process, it’s crucial to grasp what Google Ads Conversion Tracking is and why it’s an essential tool for any online entrepreneur using Google Ads.
In a nutshell, Google Ads Conversion Tracking is a a tool that shows you what happens after a customer interacts with your ads — whether they purchased a product, signed up for your newsletter, called your business, or downloaded your app. When a customer completes an action that you’ve defined as valuable, these customer actions are called conversions.
But why is this so important?
Insight into customer behavior:
Understanding these conversions provides a clear picture of how your audience interacts with your ads and your website. It tells you more than just the number of clicks or impressions; it gives you insights into how many users took meaningful action after clicking on the ad. It can lead to you understanding which keywords are most profitable or products are your best sellers with your ads. Without this conversion tracking information we are sitting dead in the water just taking educated guesses. Yikes.
Measure your ROI:
Knowing your conversions helps you understand whether the money you’re spending on Google Ads is leading to tangible results. By tracking conversions, you can see which ads and keywords bring you the most business and invest in what works. This helps you allocate your budget more effectively, ensuring that every dollar spent contributes to your bottom line.
Improve your ad campaigns:
With the data collected from conversion tracking, you can optimize your Google Ads for better performance. For instance, if you notice that a particular ad is leading to more conversions, you can increase its bid or budget. Alternatively, if an ad isn’t leading to conversions, you might decide to pause it and focus on more successful campaigns. Google is a machine learning behemoth. It only makes sense when we tell it that an action is valuable and assign a value to it. We will get better performance from Google. At the end of the day Google wants to help advertisers get in front of the right customers so having proper conversion tracking is so important to accomplish this.
In essence, Google Ads Conversion Tracking allows you to not only measure your ad effectiveness but also continuously improve your campaigns based on actual data. It’s a critical tool in your arsenal to increase profitability and make the most out of your advertising efforts.
Step 2: Create a Conversion Action in Google Ads
A conversion action is a specific customer activity that is valuable to your business. These actions can include completing a purchase, signing up for a newsletter, or calling your business, to name a few.
In this step, you’ll create a conversion action in your Google Ads account that you’ll later connect to your Shopify store. Here’s how:
Log into your Google Ads account.
This is your starting point. Make sure you’re logged into the right account.

Click on the ‘Tools & Settings’ icon in the top right corner.
This icon looks like a wrench. It’s located in the top right corner of your Google Ads dashboard.
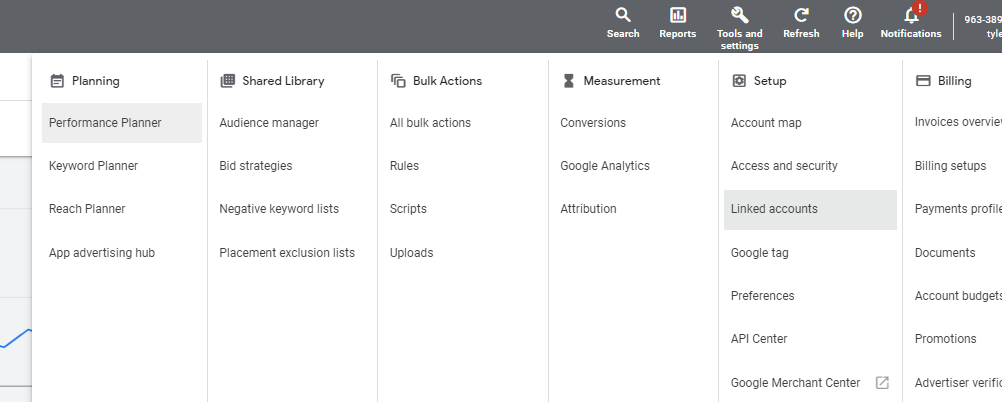
Under ‘Measurement,’ click ‘Conversions.’
This will lead you to the Conversions page, where you can manage and track the actions that are valuable to your business.
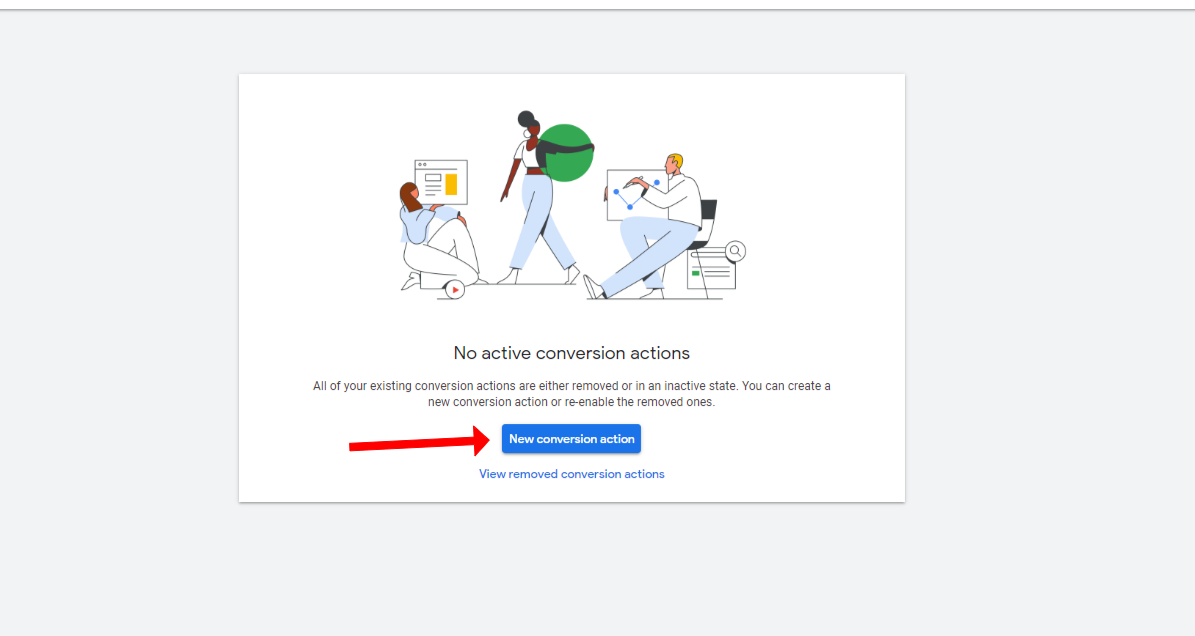
Click the blue plus button to start creating a new conversion action.
This is where the creation of your new conversion action begins.
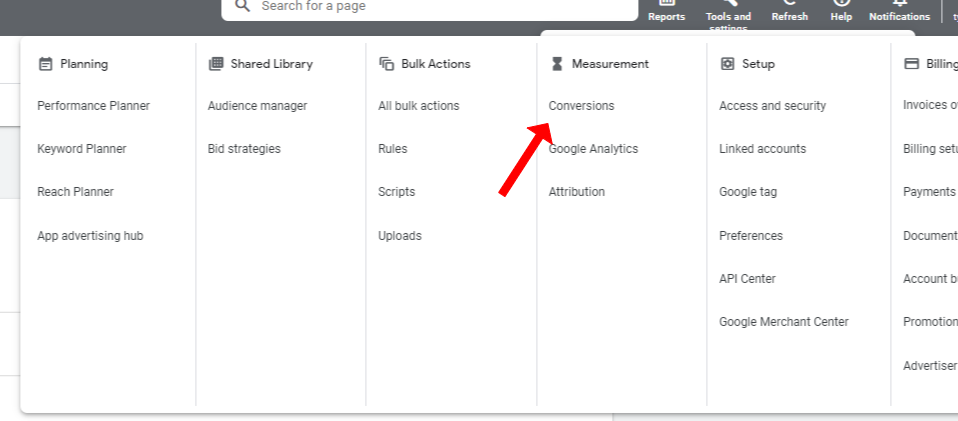
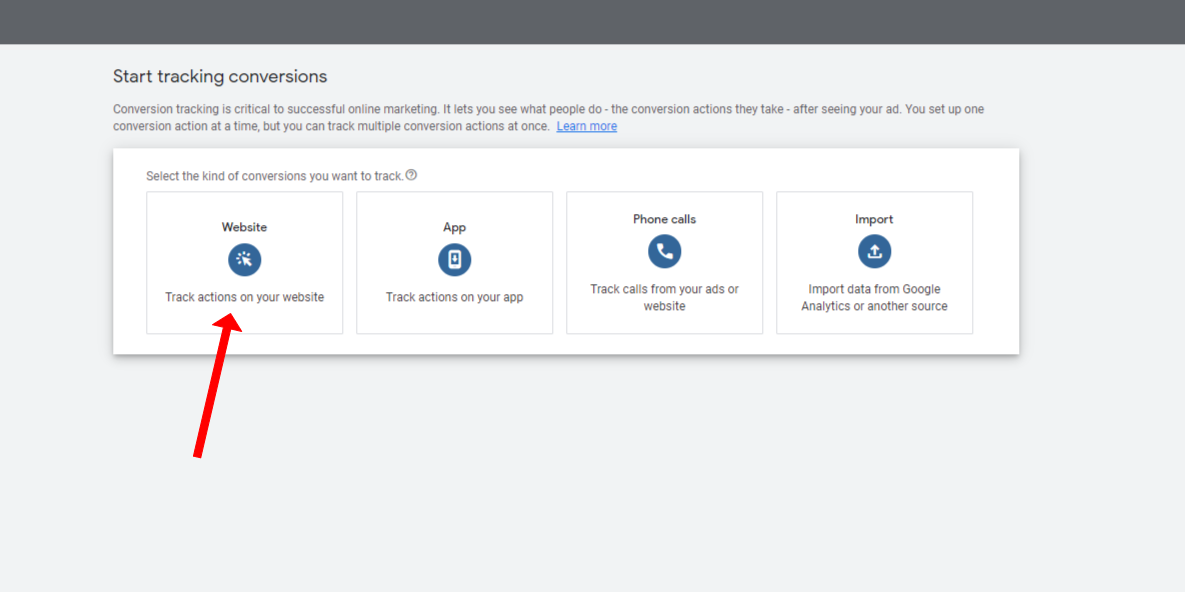
Choose the category that best fits the action you want to track.
Google Ads provides different categories like website, app, phone calls, and imported conversions. For this use case for tracking purchases on shopify we will select the website category.
Fill in the necessary information and click ‘Done’.
Here, you’ll need to fill in details about the conversion action. These include:
- Conversion name: This should clearly represent what you’re tracking, like ‘Shopify Purchase’.
- Value: Choose how to track the value of each conversion. You can use the same value for each conversion, or choose different values for each conversion.
- Count: Select how to count these conversions. This is important for businesses where every action counts (like lead generation) vs. businesses where multiple actions might count as one conversion (like e-commerce).
- Conversion window: The period after a customer’s interaction with your ad during which a conversion, like a purchase, is recorded.
- Attribution model: This determines how much credit each click gets for your conversions.
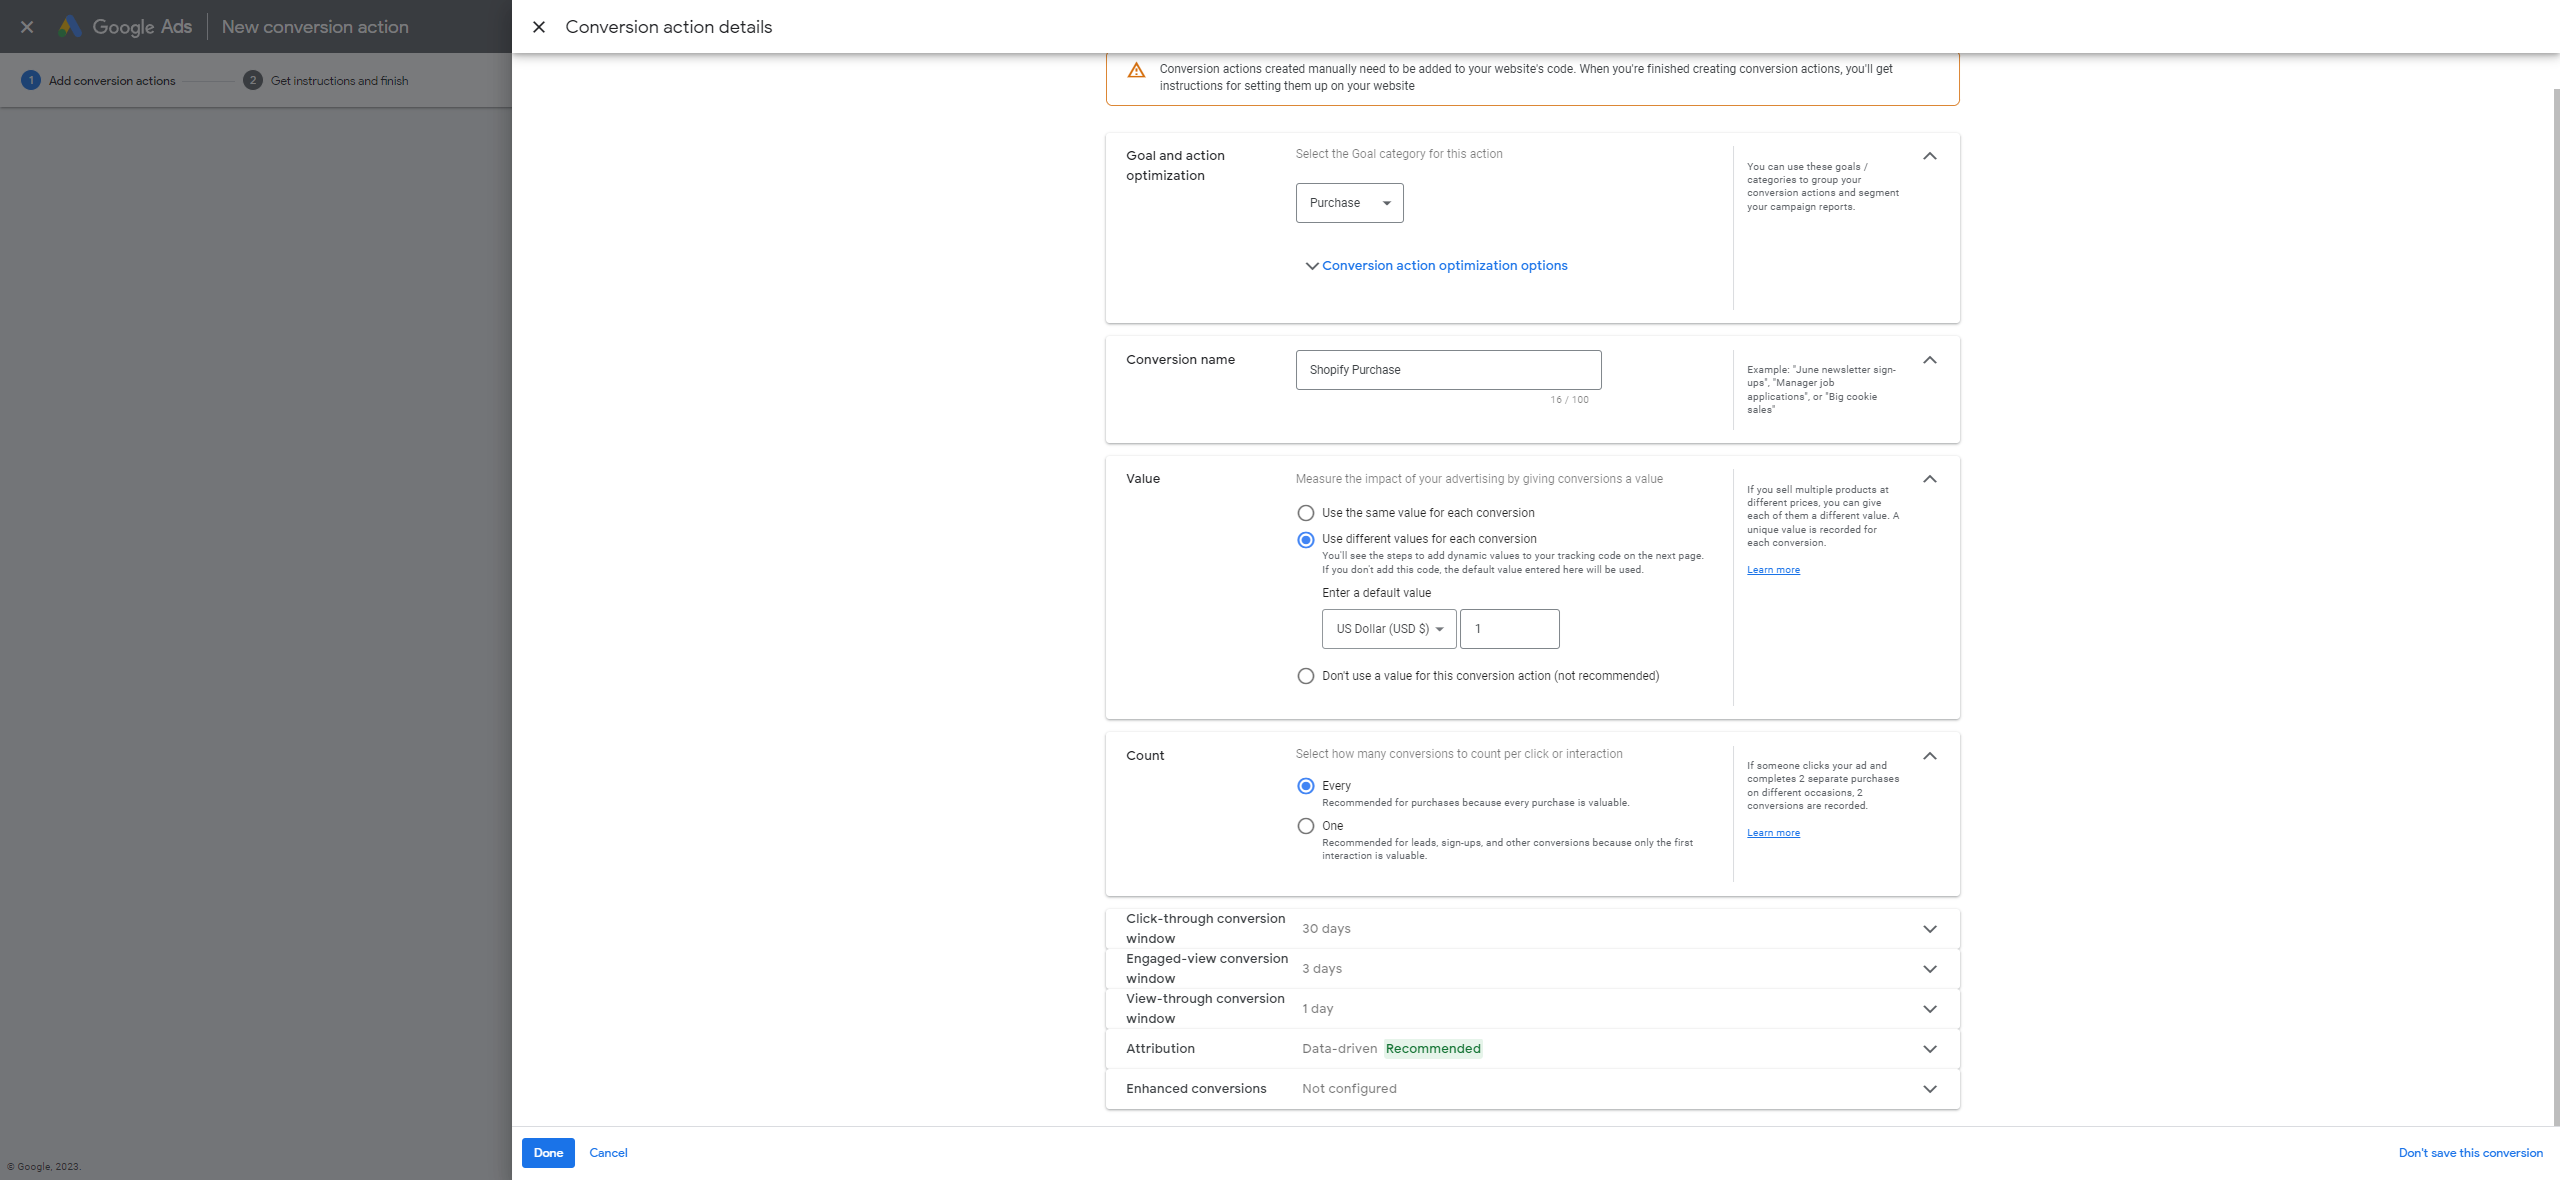
After you’ve filled everything out, click ‘Create and Continue’. You’ve now created your conversion action! The next steps will involve implementing this conversion action onto your Shopify store.
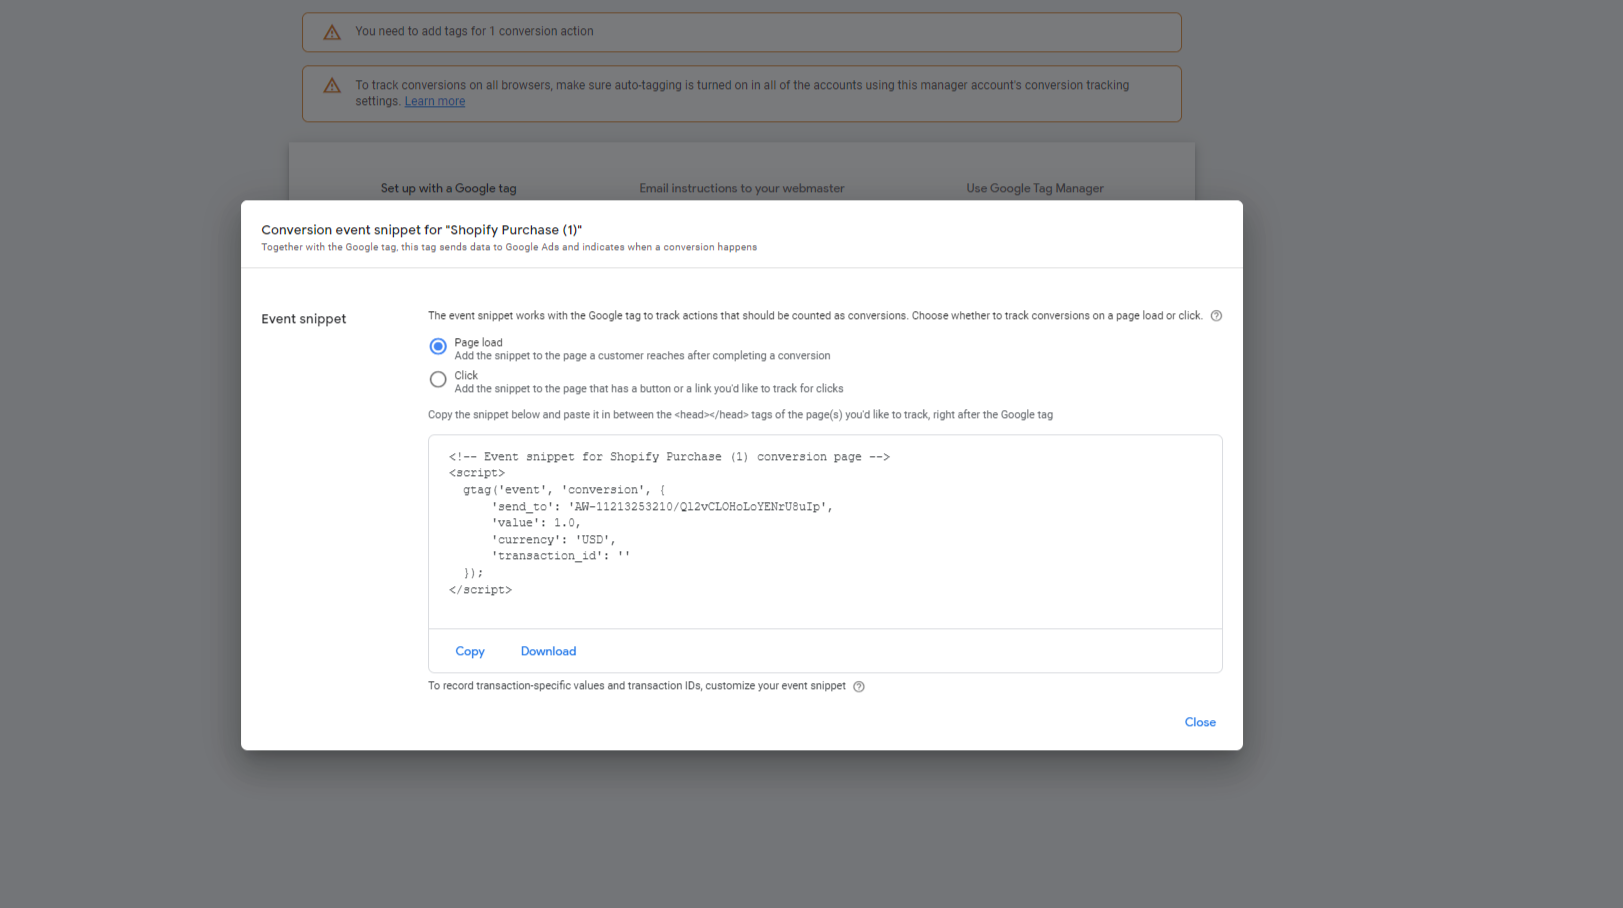
Step 3: Install Your Conversion Tracking Tag
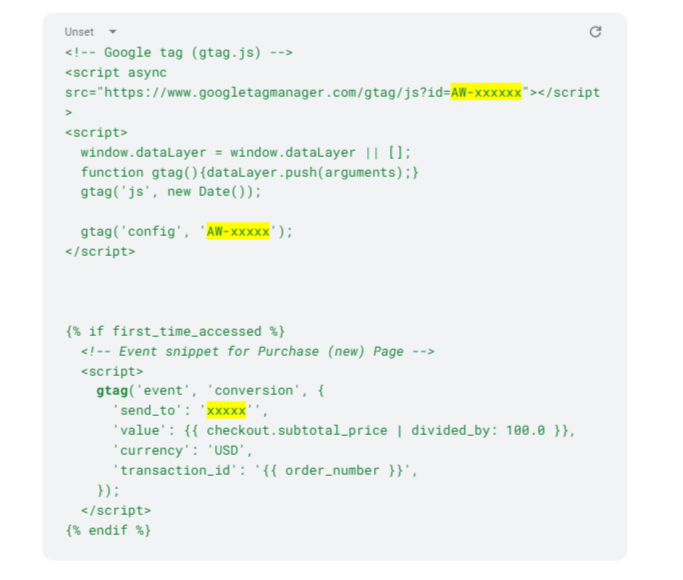
A conversion tracking tag, or code, is a small piece of JavaScript that tracks user behavior on your website. Once you’ve created your conversion action in Google Ads, the platform will generate this tag for you. You’ll need to install it on your Shopify store in two places. You will need the event snippet as depicted above and your google tag code. Your two codes should look like this:
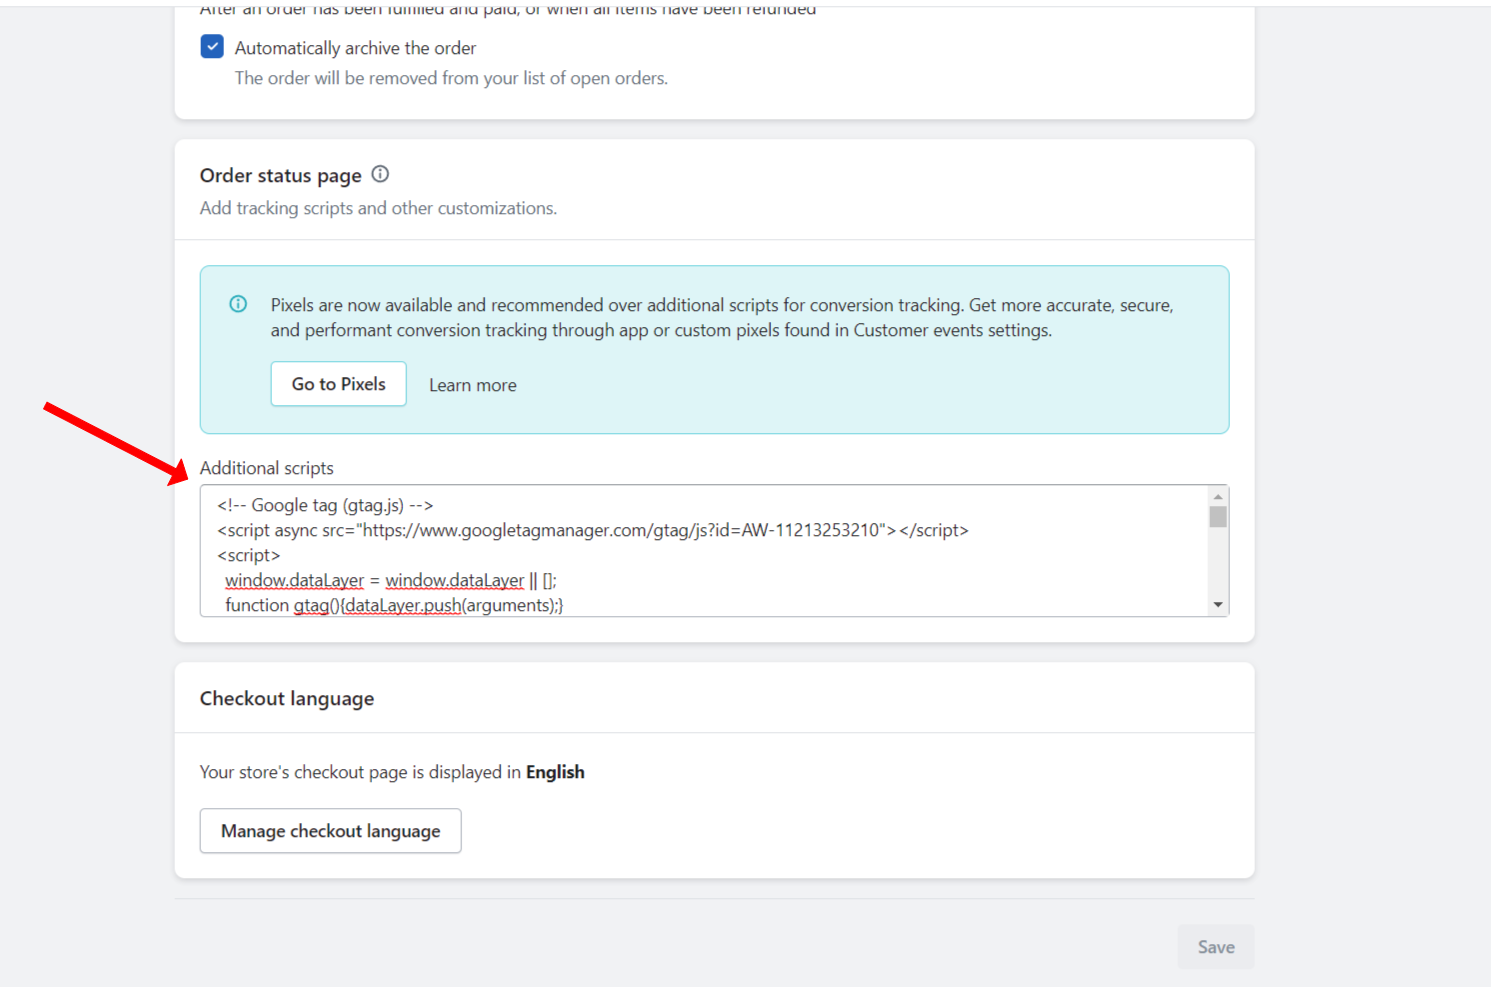
In your Shopify admin panel, go to ‘Settings’ > ‘Checkout.’
Once here you will scroll down to a box called “additional scripts” you will paste in your event snippet from google ads as well as your normal google tag it should look something like this:
Next Add The Google Tag To Your Liquid Theme File
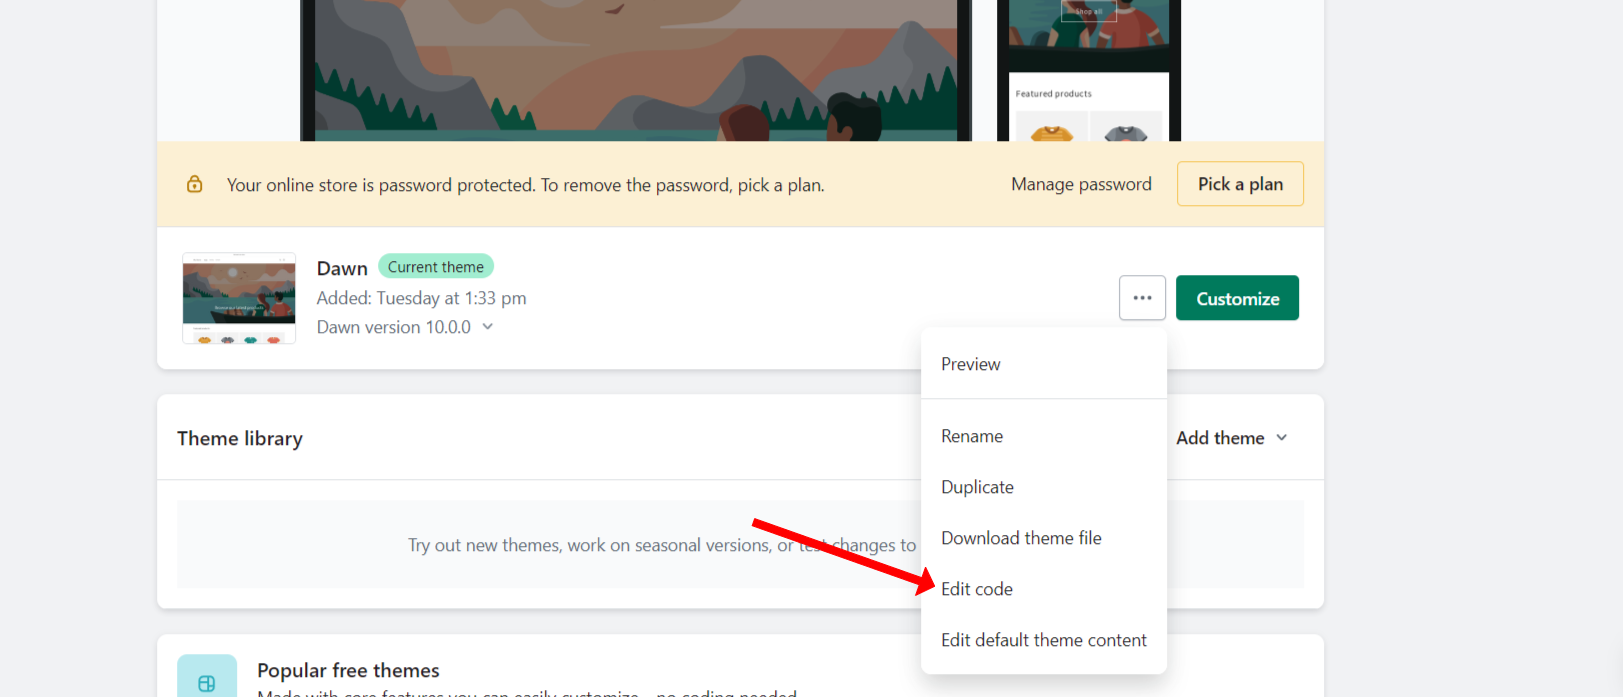
Now head to the “online store” section of your admin dashboard. Here you should see the sub selection of themes and your current active theme. Click the 3 horizontal dots and select Edit Code.
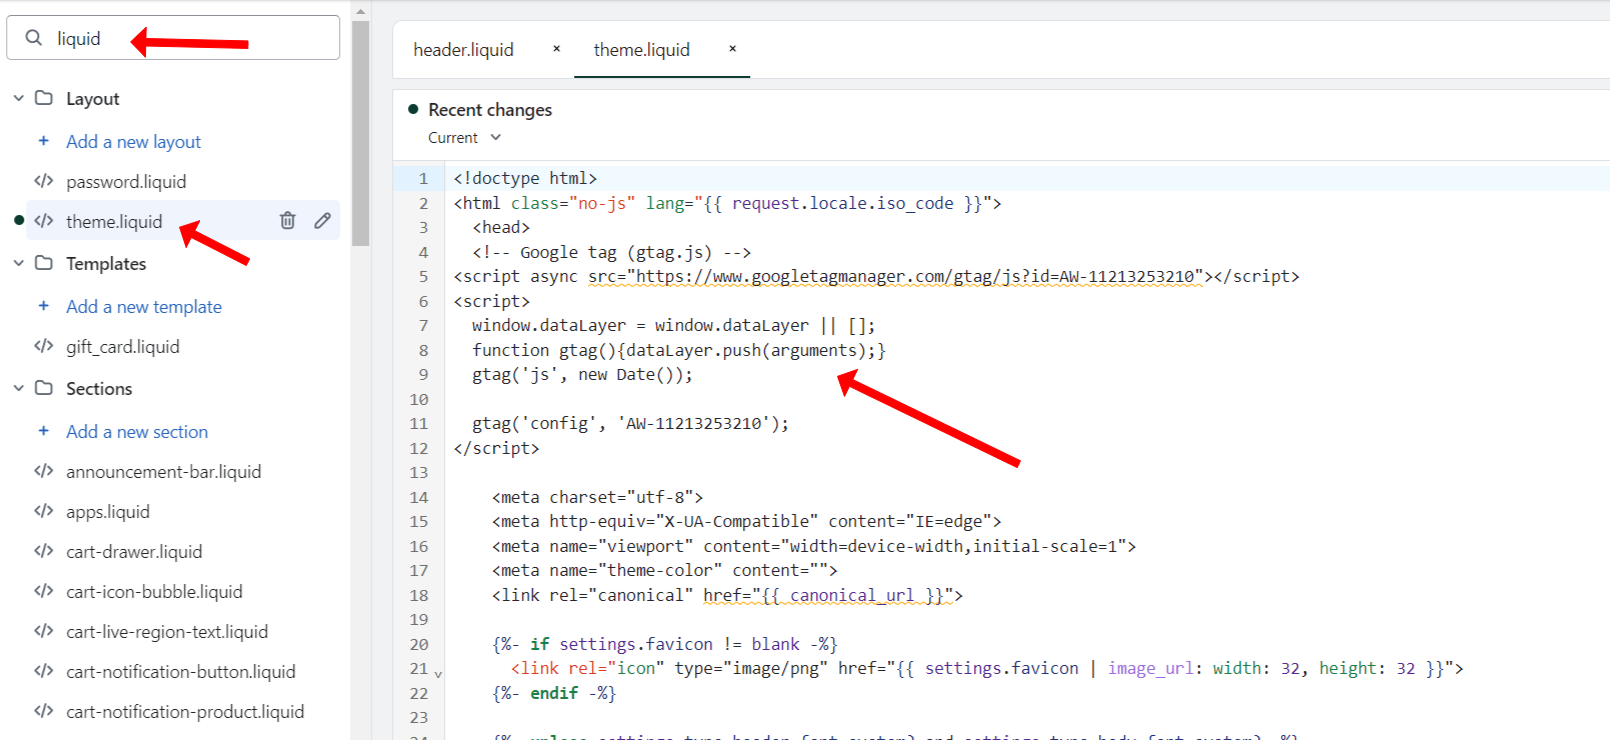
Find your liquid theme file and paste your Google Tag Code
Once this page loads type “liquid” into the search bar on top. Then you will select the file “theme.liquid” this is where you will paste your google tag code here. This needs to be placed right after the <head> tag. As well make sure you do not include the event snippet code here. This will cause problems in your tracking.
Click ‘Save’ and you are done.
Now that your conversion tracking tag is installed, you’re one step closer to understanding how users interact with your Google Ads and optimizing your ads for better performance. The next step is to test your conversion tracking to make sure everything is working as expected.
Step 4: Test Your Shopify Google Ads Conversion Tracking
With your conversion tracking tag installed, the next critical step is to test it. This ensures everything is working correctly and you’re accurately tracking the metrics that matter most to your business.
Make a test purchase from your Shopify store.
Create a test product with a minimal price and complete the checkout process just like a customer would.
Check back in your Google Ads account after a few hours.
Conversions can take up to 24 hours to appear in Google Ads, but they usually show up within 3 hours. Go back to your Google Ads account and navigate to the ‘Conversions’ page under ‘Tools & Settings’.
Check if your test conversion appears in the ‘Conversions’ column.
On the ‘Conversions’ page, look to see if your tag is active. If it appears in the status says active you should be good.
By following these steps, you can confidently track your Google Ads conversions and optimize your campaigns for better performance.
Now that you’ve mastered Shopify Google Ads Conversion Tracking, wouldn’t it be amazing to bring that same expertise to other businesses?
As a white-label partner with PPC Foundry, you can do just that. Our premier white-label service equips you with all the tools and resources you need to offer your agency clients world-class Google Ads management services. You bring your client relationships, and we deliver the results, all under your brand.
Imagine being able to offer expert Google Ads management services to your clients, without needing to hire an in-house team or spend hours trying to stay up-to-date with the latest Google Ads features and best practices.
The journey to maximizing Google Ads ROI for your clients begins with a click. Are you ready?